


CentOS6.6にインストールした、VirtualBoxにゲストOSとしてCentOS6.6をインストールする。
その後、ホストOSとゲストOSとのマウス操作などをシームレスに行えるようにGuest Additionsをインストールする。
◆ゲストOSのインストール
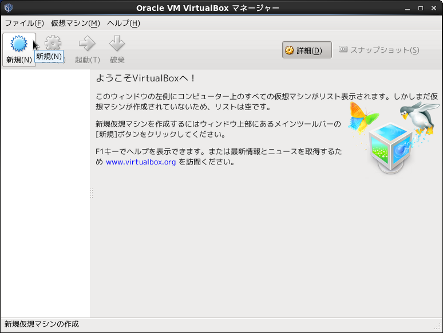
メニューから「アプリケーション」→「システムツール」→「Oracle VM VirtualBox」を起動する。
「Oracle VM VirtualBox マネージャー」が開くので、「新規」をクリックしゲストOSを追加します。
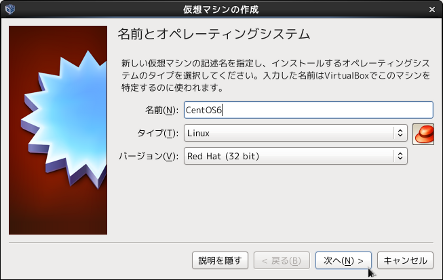
「仮想マシンの作成」ウィンドウが表示され、「名前とオペレーティングシステム」から「名前」に任意の名前を入力し、タイプとバージョンを選択し、「次へ」をクリックします。
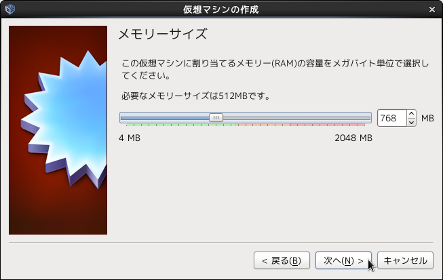
「メモリーサイズ」から仮想マシンに割り当てるメモリーサイズを選択します。
小さくし過ぎると、ゲストOSのインストール時にエラーが発生します。
ホストOSの物理メモリーサイズの半分以上の割り当てもできません。
決定後、「次へ」をクリックします。
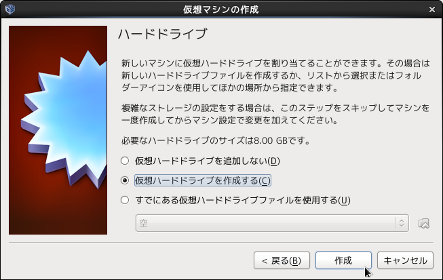
「ハードドライブ」から「仮想ハードドライブを作成する」を選択し、「次へ」をクリックします。
「ハードドライブのタイプ」から「VDI(VirtualBox Disk Image)」を選択し、「次へ」をクリックします。

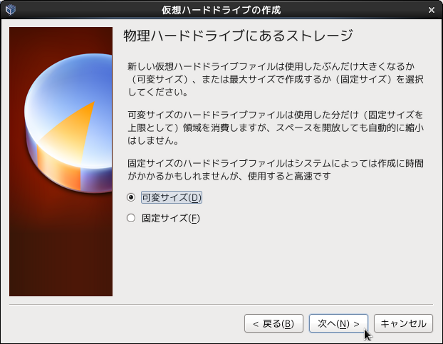
「物理ハードドライブにあるストレージ」から「可変サイズ」を選択し、「次へ」をクリックします。
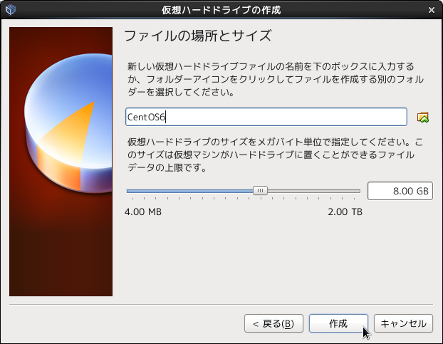
「ファイルの場所とサイズ」から、ファイルの名前にはゲストOSの名前で入力した任意の名前がデフォルトで入力されています。
「ハードドライブのサイズ」は、ホストマシンのディスク容量により任意の値とします。
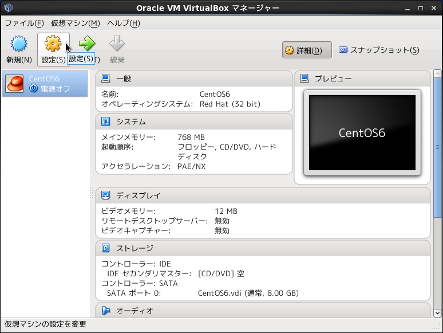
「Oracle VM VirtualBox マネージャー」画面に戻り、仮想マシンが追加されています。
次に、「設定」ボタンをクリックします。
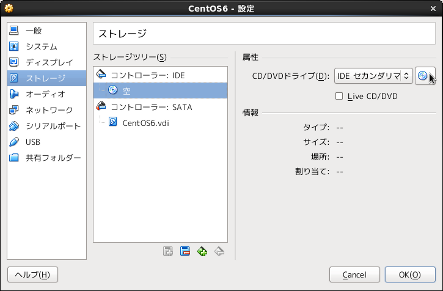
「設定」画面が表示されるので、左のメニューから「ストレージ」を選択し、「ストレージツリー」一覧の「空」を選択し、右の「属性」項目にある「CDアイコン」をクリックします。
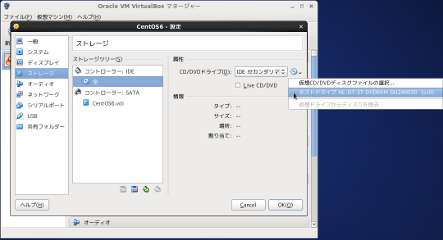
ホストOSのインストールに使用したDVDを使用するので、「ホストドライブ」を選択します。
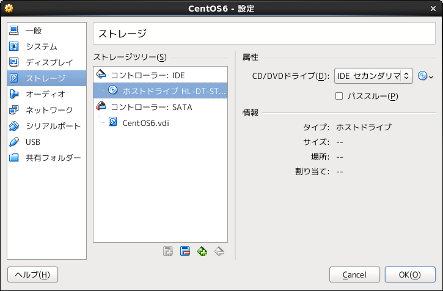
「ストレージツリー」一覧に「ホストドライブ」が挿入されますので、「OK」をクリックします。
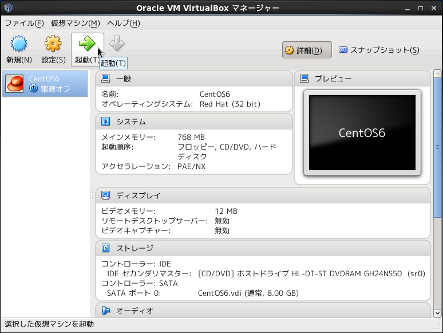
「起動」ボタンをクリックし、仮想マシンを起動します。
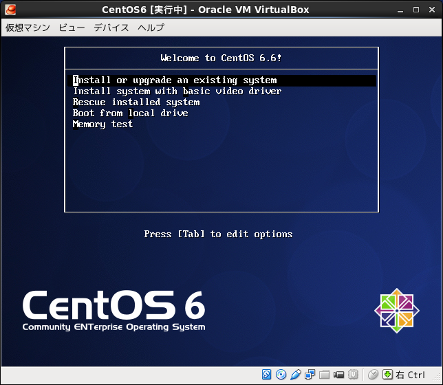
DVDブートし、CentOSのインストーラーが起動します。
CentOSのインストール要領については割愛します。
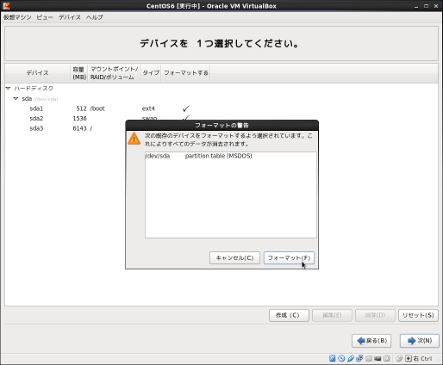
途中、「ストレージデバイスの警告」が表示されるので、「はい。含まれていません。どのようなデータであっても破棄してください。」を選択します。

「フォーマットの警告」が表示された場合は、「フォーマット」を選択します。
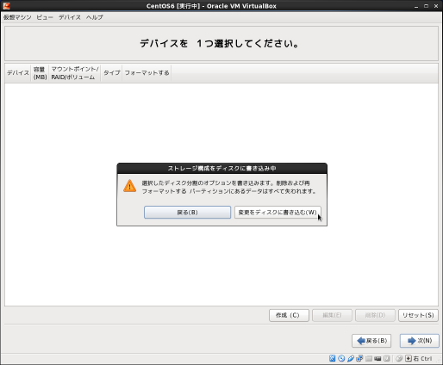
「ストレージ構成をディスクに書き込み」が表示された場合は、「変更をディスクに書き込む」を選択します。
インストールが完了し、再起動する前にホストドライブをアンマウントします。
メニュー「デバイス」→「CD/DVD デバイス」→「ホストドライブ」のチェックをオフにしてから再起動します。
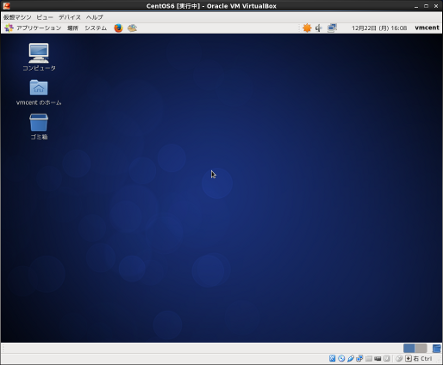
CentOS6.6が起動しました。
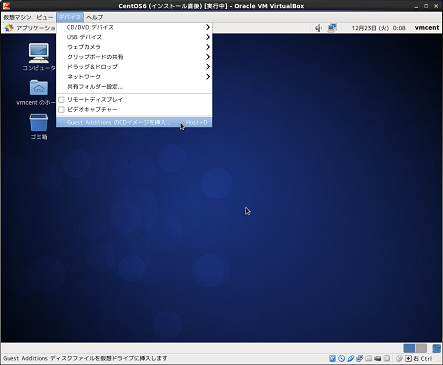
◆Guest Additionsのインストール
仮想マシンのメニューから「デバイス」→「Guest Additions のCDイメージを挿入」をクリックします。
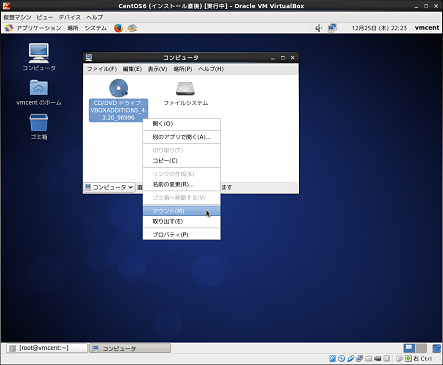
コンピュータを開き「CD/DVD ドライブ」を右クリックし、「マウント」をクリックします。
CD/DVDドライブに「VBoxGuestAdditions.iso」ファイルが挿入されます。
# df
Filesystem     1K-blocks    Used Available Use% Mounted on
/dev/sda3        6060608 2676892   3069196  47% /
tmpfs             465252     228    465024   1% /dev/shm
/dev/sda1         499656   48852    424592  11% /boot
/dev/sr0           56976   56976         0 100% /media/VBOXADDITIONS_4.3.20_96996
1行目:端末を開き、dfコマンドでマウント先を確認します。
6行目:「/media/VBOXADDITIONS_4.3.20_96996」にマウントされています。
# cd /media/VBOXADDITIONS_4.3.20_96996/
# ls
32Bit        OS2                       VBoxWindowsAdditions-amd64.exe  autorun.sh
64Bit        VBoxLinuxAdditions.run    VBoxWindowsAdditions-x86.exe    cert
AUTORUN.INF  VBoxSolarisAdditions.pkg  VBoxWindowsAdditions.exe        runasroot.sh
1行目:マウント先にディレクトリを移動します。
2行目:中を確認します。Linuxなので、「VBoxLinuxAdditions.run」を使用します。
# ./VBoxLinuxAdditions.run
Verifying archive integrity... All good.
Uncompressing VirtualBox 4.3.20 Guest Additions for Linux............
VirtualBox Guest Additions installer
Copying additional installer modules ...
add_symlink: link file /usr/lib/VBoxGuestAdditions already exists
Installing additional modules ...
Removing existing VirtualBox non-DKMS kernel modules       [  OK  ]
Building the VirtualBox Guest Additions kernel modules
The gcc utility was not found. If the following module compilation fails then
this could be the reason and you should try installing it.

The headers for the current running kernel were not found. If the following
module compilation fails then this could be the reason.
The missing package can be probably installed with
yum install kernel-devel-2.6.32-504.3.3.el6.i686

Building the main Guest Additions module                   [失敗]
(Look at /var/log/vboxadd-install.log to find out what went wrong)
Doing non-kernel setup of the Guest Additions              [  OK  ]
Installing the Window System drivers
Installing X.Org Server 1.15 modules                       [  OK  ]
Setting up the Window System to use the Guest Additions    [  OK  ]
You may need to restart the hal service and the Window System (or just restart
the guest system) to enable the Guest Additions.

Installing graphics libraries and desktop services componen[  OK  ]
1行目:インストールの実行
10行目:gccパッケージが見つからなくて失敗しました。
16行目:kernel-develもインストールしろと言っています。
# yum -y install kernel-devel
   ~中略~
インストール:
  kernel-devel.i686 0:2.6.32-504.3.3.el6

完了しました!
# yum -y install gcc
   ~中略~
インストール:
  gcc.i686 0:4.4.7-11.el6

依存性関連をインストールしました:
  cloog-ppl.i686 0:0.15.7-1.2.el6
  cpp.i686 0:4.4.7-11.el6
  mpfr.i686 0:2.4.1-6.el6
  ppl.i686 0:0.10.2-11.el6

完了しました!
1行目:kernel-develのインストール
7行目:gccのインストール
# ./VBoxLinuxAdditions.run
Verifying archive integrity... All good.
Uncompressing VirtualBox 4.3.20 Guest Additions for Linux............
VirtualBox Guest Additions installer
Removing installed version 4.3.20 of VirtualBox Guest Additions...
Copying additional installer modules ...
add_symlink: link file /usr/lib/VBoxGuestAdditions already exists
Installing additional modules ...
Removing existing VirtualBox non-DKMS kernel modules       [  OK  ]
Building the VirtualBox Guest Additions kernel modules
Building the main Guest Additions module                   [  OK  ]
Building the shared folder support module                  [  OK  ]
Building the OpenGL support module                         [  OK  ]
Doing non-kernel setup of the Guest Additions              [  OK  ]
Starting the VirtualBox Guest Additions                    [  OK  ]
Installing the Window System drivers
Installing X.Org Server 1.15 modules                       [  OK  ]
Setting up the Window System to use the Guest Additions    [  OK  ]
You may need to restart the hal service and the Window System (or just restart
the guest system) to enable the Guest Additions.

Installing graphics libraries and desktop services componen[  OK  ]
1行目:再度インストールの実行。今度は、エラーがなくインストールされました。
マウスを動かしてみると、ゲストOSとホストOSの間でシームレスに移動できるようになっています。
最後に、CD/DVDドライブからイメージファイルをアンマウントし、仮想マシンのメニューの「デバイス」→「CD/DVD デバイス」→「ホストドライブ」のチェックをオンにして終了します。